Scrub Cap Hair: 7 No-Slip Styles for Long Shifts
Seven scrub cap hairstyles that stay put through long shifts without headaches or breakage, plus quick cap-fit tweaks and hair-protection tips for every hair length and texture.
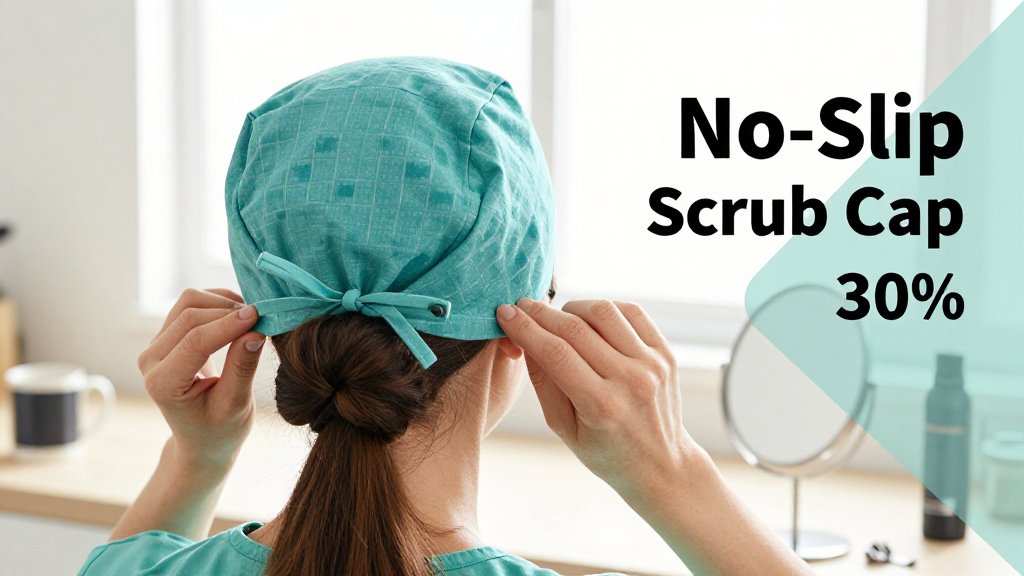
A long shift is hard enough without fighting your scrub cap every hour. If your cap creeps back, your bun starts to ache by midday, or your edges feel stressed from the same tight ponytail, it is time for a better plan. In this guide, you will learn seven no-slip scrub cap hair styles designed for comfort and staying power. Each option includes quick setup steps, plus small adjustments that help reduce tension, keep hair flat, and protect strands for 8 to 12 hours.
What actually stops scrub cap hair from slipping
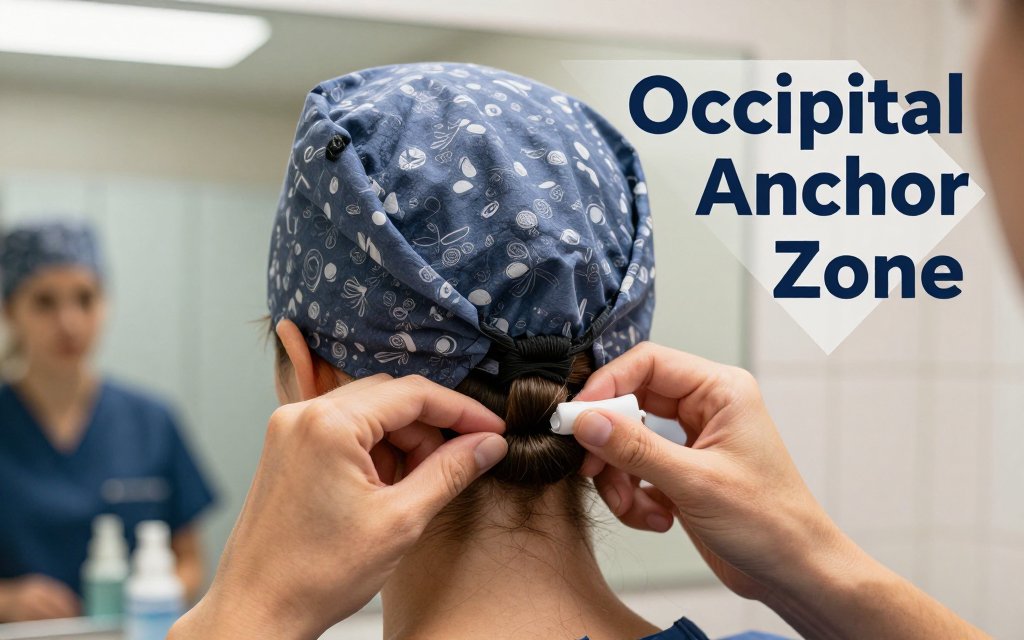
A scrub cap usually slips for one of three boring (but fixable) reasons: the cap is getting pushed up by bulk at the back of your head, the style is creating a single “hot spot” of tension, or your hairline is too slick for the fabric to grab. Instead of blaming your hair texture, think in simple anatomy. The occipital bone is that rounded bump on the back of your skull, and it is the spot where a cap either seats securely or rocks like a teeter-totter. The goal is not maximum tightness. The goal is a stable, low-profile shape that lets the cap lie flat and stay put through hours of turning your head, leaning over patients, and quick changes.
The no-slip formula: flat, anchored, low tension
Rule of thumb you can use tomorrow morning: the best scrub cap hairstyles keep bulk low at the crown and anchor at the nape or mid-occipital area. High buns and top knots feel efficient, but they act like a doorstop under fabric. They lift the cap up and back, which loosens the hairline, then the whole cap starts creeping. If you are wearing a traditional tie-back cap, that lift also changes where the ties sit, so you end up tightening harder and harder. For long or thick hair, aim for a bun thickness you can pinch to about 1 to 1.5 inches. If it is thicker than that, split the hair into two twists (stacked vertically) or move the bun to the nape so the cap can lie flat.
Anchoring matters because caps slip forward and back more than they slip side to side. A nape-based low bun, low braided coil, or a “looped pony” (pony tail, then flip the length halfway through the elastic to create a compact loop) creates a shelf that the cap can hug right at the occipital area. If your hair is fine, freshly washed, straightened, or naturally silky, add grip before you style. A light mist of texturizing spray, a little dry shampoo at the roots, or even a pea-size dab of styling cream at the nape gives the fabric something to hold. The point is gentle friction, not stiff crunch. If you are growing out layers that refuse to stay in a low style, you may like this bob-to-lob grow-out plan for keeping the shape tidy while your length changes.
Headaches usually come from concentrated tension at one point, most often a tight ponytail base that then gets folded into a bun. Under a cap, that pressure has nowhere to go, so it feels like a constant pinch. Spread the tension across more surface area. One easy fix is two anchors instead of one: secure a low ponytail with a soft elastic, braid the tail, then coil and pin the braid with two to four bobby pins placed in an X shape. Another fix for very long hair is to split it into two low twists, wrap both around each other at the nape, then secure with a second elastic. Cap fit tweaks help here too. If your cap has ties, tie them low and slightly apart, not high at the crown, so the pressure sits on the occipital area instead of your temples.
If your cap slides, do not crank it tighter. Flatten the back of your style at the occipital bone, anchor at the nape, then add a touch of hairline friction. Comfort comes from spread-out tension, not a single tight ponytail base.
Protect hair from breakage under caps in 60 seconds
Breakage under caps is usually a combo of friction plus repeated stress in the same spot. Your 60 second prep can be simple: smooth a pea-sized leave-in conditioner through the last few inches of your hair (ends are the oldest and most fragile), then choose a satin-lined cap if you have one, or add a thin satin scarf just at the hairline where baby hairs rub. Finish with a snag-free elastic, like Goody Ouchless-style fabric bands or a spiral coil tie, to avoid cutting into the hair shaft. This is especially helpful for curls and coils, where dryness plus friction can lead to snapped strands around the edges. You are aiming for protected slip under the cap, while still keeping enough grip at the roots to stop sliding.
The most common mistakes are surprisingly consistent: wearing the same tight ponytail in the same exact location shift after shift, using rubber bands “just for today,” and yanking hair forward to catch it under the front edge of the cap. That last one feels secure for five minutes, then it creates tension right at the hairline and makes the cap slide back anyway. Dermatologists also warn that repeated pulling hairstyles can contribute to traction alopecia, so it is smart to rotate your placement and keep styles comfortable, as outlined in the American Academy of Dermatology guidance on hairstyles that pull hair. If your scalp stings when you take your hair down, treat that as a signal to change the setup, not something to push through.
If you get the classic “tight bun ponytail” headache, fix it in two steps. First, loosen the base, then rebuild the anchor. Slide a finger under the elastic and gently pull outward in four directions to relax pressure evenly across the scalp, especially near the temples. Second, switch from one tight tie to two softer anchors: a loose elastic at the nape plus pins or a second elastic around the coil. That spreads tension across the occipital area instead of a single point. For cap fit, match the cap style to your hair volume. Thicker hair often does better in a roomier bouffant cap, while a sleek low coil pairs well with a tie-back cap. Either way, the winning combo is the same: flat profile at the occipital bone, tension spread wide, and just enough friction at the hairline to stay comfortable all shift.
7 scrub cap hairstyles that stay put all shift
The secret to scrub-cap hair that lasts through a double is not “tight,” it is “anchored.” Aim for low bulk at the nape, balanced tension (so your scalp is not throbbing by lunch), and a shape that lets the cap sit flat. Most of the styles below take about 2 to 5 minutes once you have done them a few times, and they work on straight, wavy, curly, coily, fine, and thick hair with small tweaks. If you need a quick reality check, the American Academy of Dermatology notes that if a style feels painful, it is too tight, which is why these options focus on low, gentle security rather than a snatched ponytail. See their guidance on hairstyles that pull. (aad.org)
Long to medium hair: 4 no-slip bun and braid options
Style 1: No-slip bun under scrub cap at the nape (two-ponytail method). Start with dry or slightly damp hair. Part ear-to-ear so you have a “top” and “bottom” section. Gather the bottom section into a low ponytail right at the nape, then gather the top section into a second low ponytail directly above it. Twist each ponytail into a small bun, then flatten each bun against your head and pin it like you are “taping” it down with bobby pins. Finally, overlap the buns slightly so the cap has one smooth low area instead of a bump. Best for: thick hair, long hair, and anyone who gets headaches from one heavy ponytail pulling in one spot.
Style 2: Low braided bun (one braid, wrap, pin). Brush your hair into a low ponytail at the nape (use a soft scrunchie for curls, or a thin elastic for straight hair). Braid the ponytail all the way down, then lightly tug the braid edges for a little width if your hair is fine. Wrap the braid around the base like a cinnamon roll, keeping it tight to the head (not tight to the scalp). Secure with bobby pins placed horizontally so they grab hair and a bit of scalp hair underneath. Tuck the tail end under the bun and pin again. Best for: medium hair, fine hair that needs “grip” from braiding, and curly hair that stays put once it is braided.
Style 3: Double French braids into a low tuck (great for slippery straight hair). Make a center part from forehead to nape. French braid each side back, keeping the braids close to the scalp but not painfully tight. Stop braiding at the nape, then secure both ends with small elastics. Cross the braid tails over each other at the nape, tuck the ends under themselves, and pin flat so the cap sits smoothly. Style 4: Rope-twist chignon with spin pins (fast, low profile). Put hair in a low ponytail, split into two sections, twist each section in one direction, then twist them around each other and coil into a compact chignon at the nape. Secure with 2 spin pins screwed in opposite directions. Best for: straight hair, silky hair, and medium to thick hair that needs a flatter hold.
Short hair and layers: 3 cap-friendly styles
Style 5: Low micro-ponytail with mini claw clip hidden at the nape. This one is a lifesaver for shoulder-length hair with layers that pop out under a cap. Gather everything you can into a tiny ponytail right at the nape, even if it is only the bottom half of your hair. Twist that little ponytail upward once, then clamp it with a mini claw clip so the clip sits low and is covered by the cap line. Use 2 bobby pins to pin down any short pieces that kick out, aiming the pins toward the center so they do not slide. Best for: layered cuts, fine hair that needs a “mechanical” grip, and short-to-medium hair that cannot form a full bun.
Style 6: Twist-and-pin sides with a flat nape tuck (ideal for bobs). Start with a side part or middle part, whichever keeps your front pieces calmer. On each side, take a 1-inch front section, twist it back toward the ear, then pin it flat just behind the ear. Repeat with a second small section if your bob is stubborn. At the back, gather the remaining hair at the nape and do a simple “roll and tuck,” roll the ends upward toward the scalp and pin across the roll so it lies flat. Best for: bobs, wavy hair that behaves with twisting, and anyone who wants very low bulk where the cap elastic sits.
Style 7: Headband braid or two small front twists under the cap edge (prevents flyaways and friction breakage at temples). If your cap rubs at the hairline, do two mini twists: take small sections at each temple, twist back, and pin them just above the ear so the cap edge covers the pins. If you have enough length, swap twists for a thin “headband braid” that runs from one temple to the other, then pin the tail behind the ear. Best for: short hair, curly hair that frizzes at the front, and anyone growing out bangs. Short-hair under scrub cap tip: use 2 to 4 bobby pins crossed like an X for a stronger lock, and lightly spray the pins with hairspray before inserting if your hair is very fine and slippery.
Cap fit tweaks and answers to common questions
A scrub cap that feels good at hour one can feel totally different at hour ten, especially if your hair is thick, heavy, or textured. The goal is even, gentle pressure around the head, not a single tight hotspot behind your ears or at the base of your skull. Start by choosing the tie style that matches your hair bulk: tie-back caps and caps with a toggle let you fine tune tension, while fully elastic caps are quick but can pinch if you are sensitive. If you wear glasses, test the cap with your frames on, then adjust the tie angle so the fabric edge is not pressing the arms into your temples. Small changes in bun height and tie placement can also flatter your face shape, like setting the bun slightly higher to visually lengthen a round face, or keeping it lower and smoother for a longer, oval face.
Make your cap work with your hair, not against it
Tie placement matters more than most people think. The ties should sit above the bun, not on top of it, so you are not cinching down the exact spot that is already carrying hair weight. If the ties land on the bun, the knot can act like a lever that nudges the cap upward every time you turn your head. Aim for a snug fit that feels the same at the hairline, crown, and nape. If it feels tight only at the temples, loosen slightly and retie higher. If it feels tight only at the nape, move your bun up a bit or switch to a flatter style like a braided coil. For thick or coily hair, keep volume spread wide instead of tall, which usually reduces cap shifting and pressure points.
Two fast slip fixes take less than a minute, and they work on straight, wavy, curly, and coily textures: - Add a thin grippy headband right at the hairline (a low profile silicone or velvet style works well under fabric). - Place two bobby pins horizontally at your temples as little “stops” for the cap edge, then pull the cap down to meet them. Here is the counterintuitive tip that saves a lot of long shifts: loosen the bun slightly after you secure it. A bun that is a bit wider and softer gives the cap more surface area to grip, and it often stops that annoying ride-up that happens with a tight, compact topknot. If you have fine hair, mist a little dry shampoo at the roots before you put the cap on so the fabric has more traction without needing extra tight ties.
FAQ: scrub cap hair and long shift comfort
Comfort is not just a nice-to-have, it is part of keeping your style sustainable. If your go-to bun leaves you with a sore scalp, frizzy breakage at the hairline, or that tender spot at the crown, your hair is asking for less tension and better distribution. Dermatologists warn that repeated pulling from tight styles can contribute to traction alopecia, which is why rotating styles and avoiding pain is smart long term. If you want the medical version of that advice, the American Academy of Dermatology has a clear overview of how hairstyles that pull can lead to hair loss. Use the FAQs below as your pre-shift checklist, and do not be afraid to adjust mid-shift, a tiny retie can prevent hours of discomfort.
How do I stop my scrub cap from sliding off during a 12-hour shift?
Start with structure, then add friction. Put your hair into a low profile base (a flat braided bun, a low twist, or two mini buns) so the cap sits on an even surface. Tie the cap above the bun and check that the pressure feels balanced around your head, not tight only at the forehead. For extra security, use one quick add-on: a thin grippy headband at the hairline, or two horizontal bobby pins at the temples to act as edge stops. If the cap still creeps back, loosen your bun slightly to widen it, since a wider bun often grips better than a tight knot.
What is the best low tension hairstyle if I get a headache from a tight bun or ponytail?
Try a low twisted bun at the nape secured with a soft scrunchie, then pin the twist flat with a couple of bobby pins so the weight spreads across a wider area. Another great option is a single French braid (or two braids) that you coil and pin low, since braids hold without needing a tight elastic at one point. Keep the first tie pass gentle and avoid yanking hair tight at the hairline. If you feel pain within 30 minutes, that is a signal to retie lower, loosen the base, or switch to a braid-based style that anchors with pins instead of tension.
What are the best short hair under scrub cap tips for bobs and layers?
With short hair, the cap usually slips because layers escape at the nape and temples, then the fabric edge rides up. Give the cap “anchors” by pinning first: slide two bobby pins above each ear, horizontal to the floor, then pull the cap edge down to meet them. At the nape, gather the bottom inch into one or two tiny ponytails with small snag-free elastics, then tuck them up and pin flat. If your layers are wispy, smooth a pea-sized amount of lightweight gel or leave-in cream along the hairline, then press it down for 10 seconds before you cap up. A side part under the cap can also feel less bulky than pushing everything straight back.
Ready to see how a new hairstyle looks on you before you commit? Try Fravyn to preview 50+ styles on your own photo in seconds, so you can find a look that feels like a better fit for your routine. Download the app, test a few options, and save your favorites for your next shift. Get it here on iOS and start experimenting today.
Try a New Hairstyle Today
Preview 50+ hairstyles and 29+ colors on your own photo with Fravyn.